Ask a Question

×

Awaiting product imageViz Bundle

Sale!

Two great pre-visualization and planning tools bundled together: BeamViz for lighting and ProjectionViz for projections.

For Vectorworks 2021 and above

Version - October 11, 2024 for Vectorworks 2021 and above

Download Viz Bundle

Includes a -day free trial

Use this installer format with the Vectorworks Plug-In Manager
Full instructions

From: 27,00 

Buy

ProjectionViz 1 works with Vectorworks 2019 and above.

Key Features

Planning

Numerous ways to calculate projector placement, image size and shape, and projector specifications, including:

  • Projector hanging height and location
  • Throw
  • Focus height by cone center, image top, and image bottom
  • Pan and Tilt
  • Rotation around the projection axis
  • Lens shift
  • Image plane orientation
  • Image size
  • Lens ratio
  • Aspect ratio
Scrren_Shot
No gallery images available.

Interactive control of projector and image in both 2D and 3D

No gallery images available.

Set the image plane to any angle, including the ground

Scrren_Shot
No gallery images available.

Precision-calculated cone geometry and image shape, including keystoning

Scrren_Shot
No gallery images available.

Calculate illuminance

No gallery images available.

Simulate an image plane

No gallery images available.

Visualize projected images in Renderworks

Scrren_Shot
No gallery images available.

Display labels

No gallery images available.

Add a coordinated Spotlight Video Screen object

No gallery images available.

View from the projector to create the basis for image masks

No gallery images available.

BeamViz Object

Interactively draw lighting beams. The beam size and shape adjust as you drag and nudge the beam.

Adjustable properties include: Position Height, Distance to C-Clamp, Field Angle, Beam Angle, Peak Candela, Face Plane Height, Show/Hide Beam on Floor.

PAR mode with interactive bottle rotation.

Focus from any position height to any focus height, even if the light focus up or hits the face plane in an open parabola.

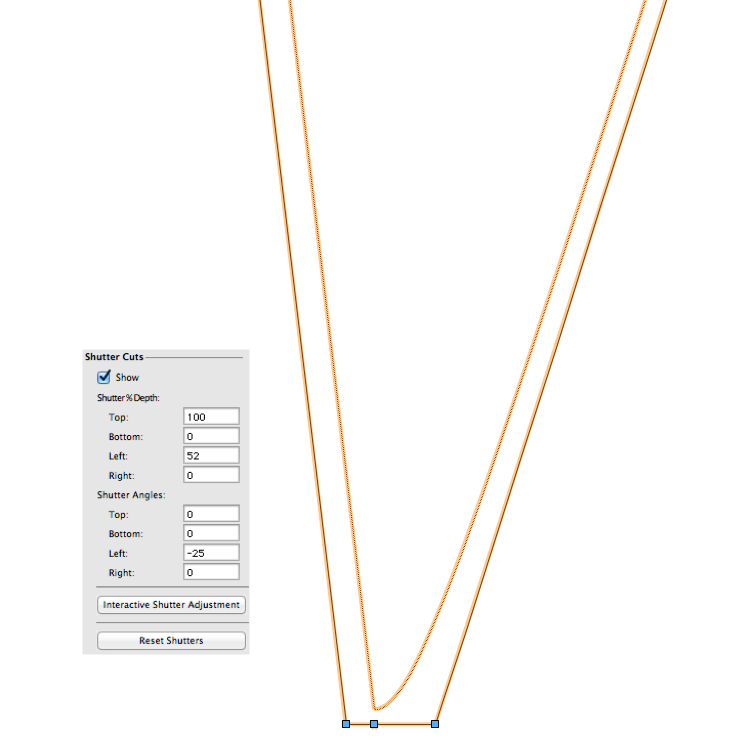
Visualize shutter cuts. You can drag the shutters right in the drawing!

View valuable data on how your light focuses.

Completely stand-alone

BeamViz lets you concentrate on worksheeting your rough plot — save drafting for later. You can use Beam Draw to easily determine ideal instrument placement in any blank document, and integrate with Spotlight Lighting Devices later.

BeamViz Section

Visualize beam sections in a 2D view. This is also a fully interactive tool. BeamViz Section will even draw a figure for you, and show you what portion of the section includes the full width of your focus area.

Scrren_Shot
No gallery images available.
Screen_Shot

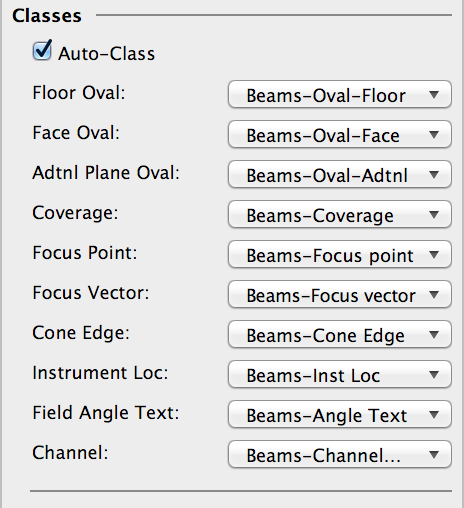
Discrete class control

Discrete class control for each component of the object, including an option to automatically set classes
Screen_Shot

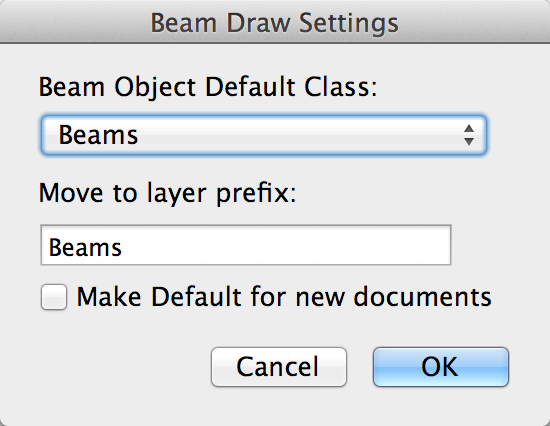
Class Insertion Defaults

Settings preferences for default class and default Move to Layer prefix
Screen_Shot

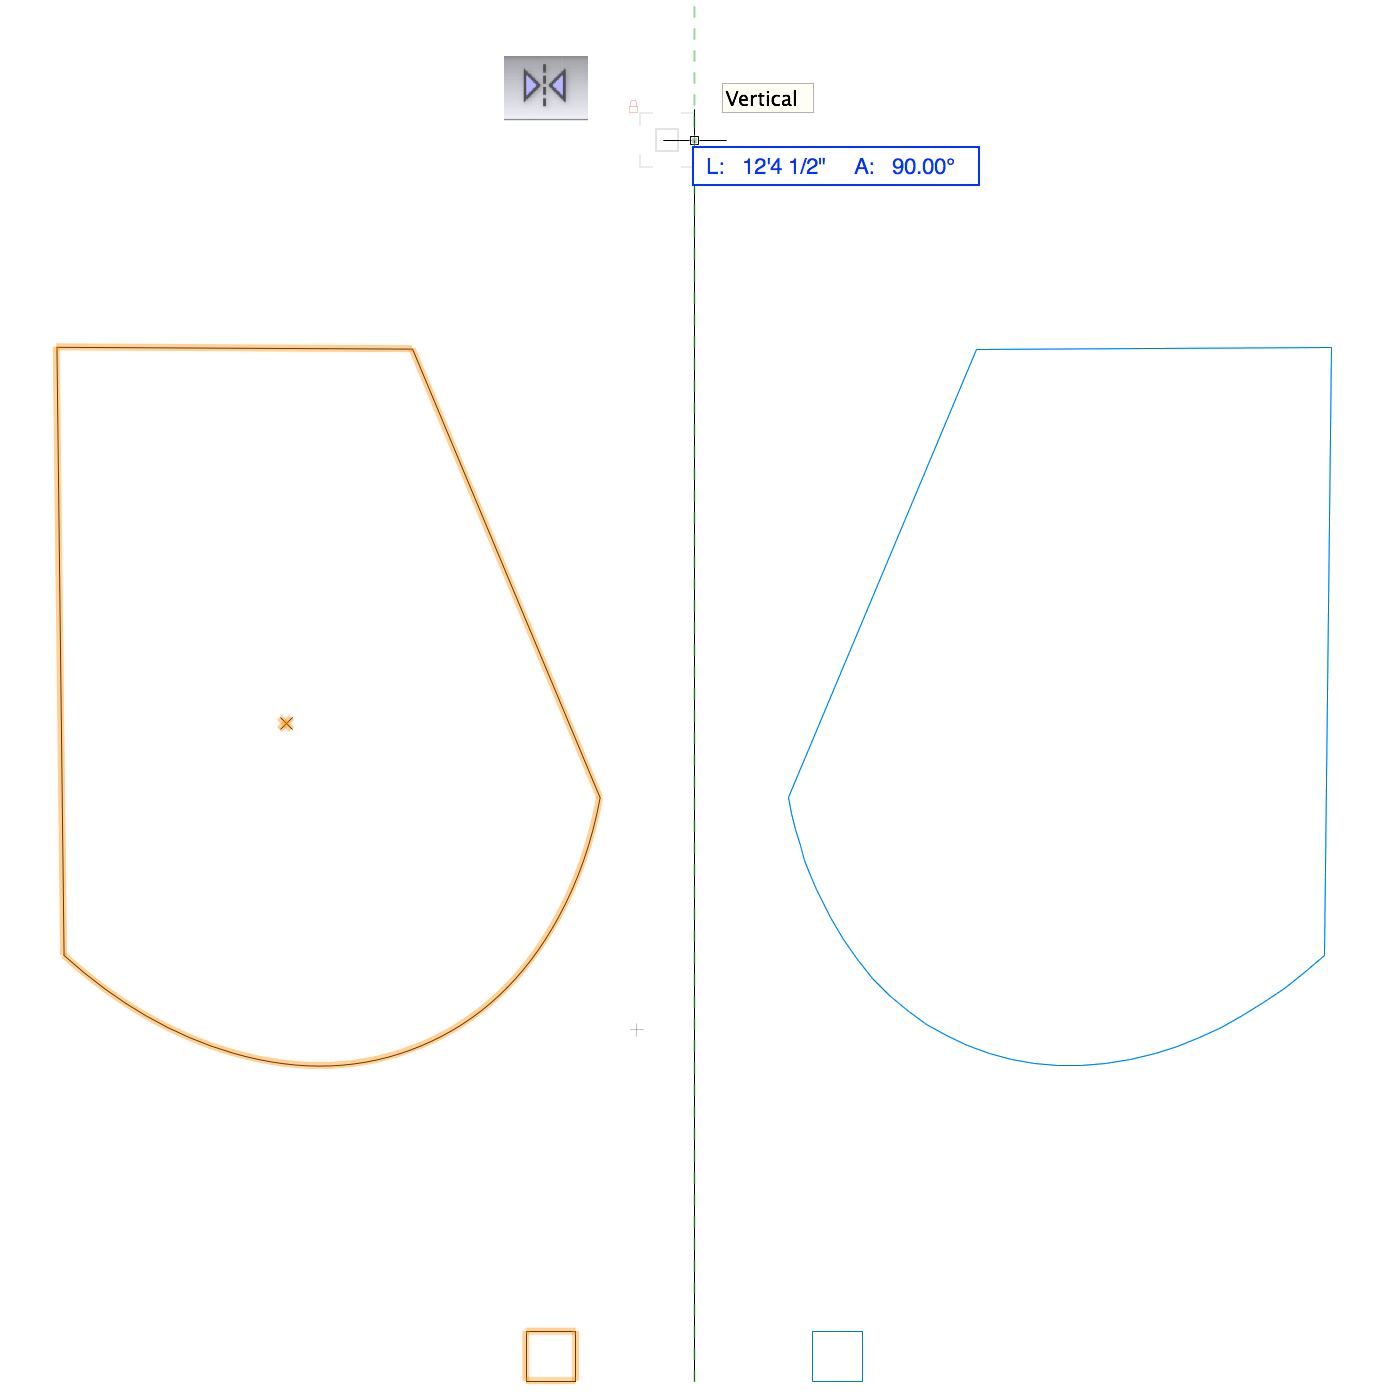
Mirror Tool Support

All Beam objects now properly flip when using with the mirror tool and a horizontal or vertical line of reflection
Screen_Shot

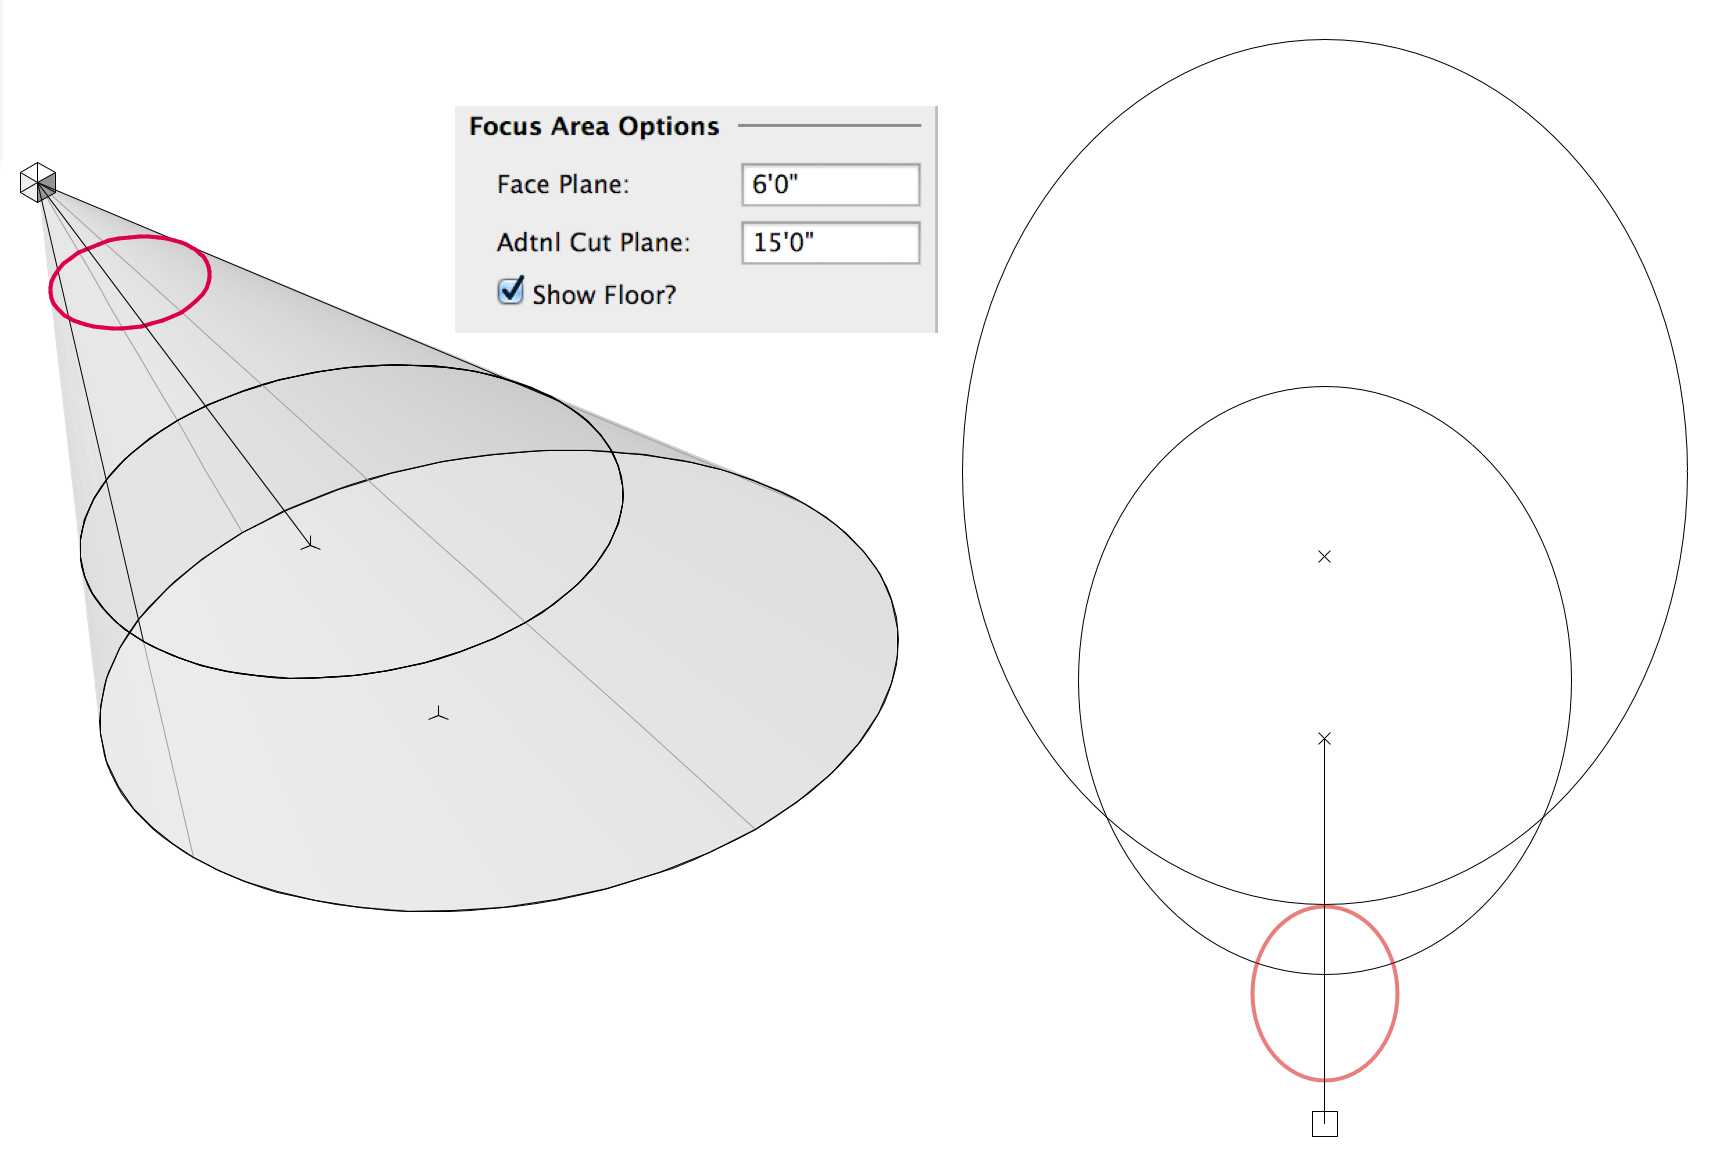
Additional Cut Plane

Additional Cut Plane parameter, to check coverage at any height. Perfect for checking shots through scenery or under masking
Screen_Shot

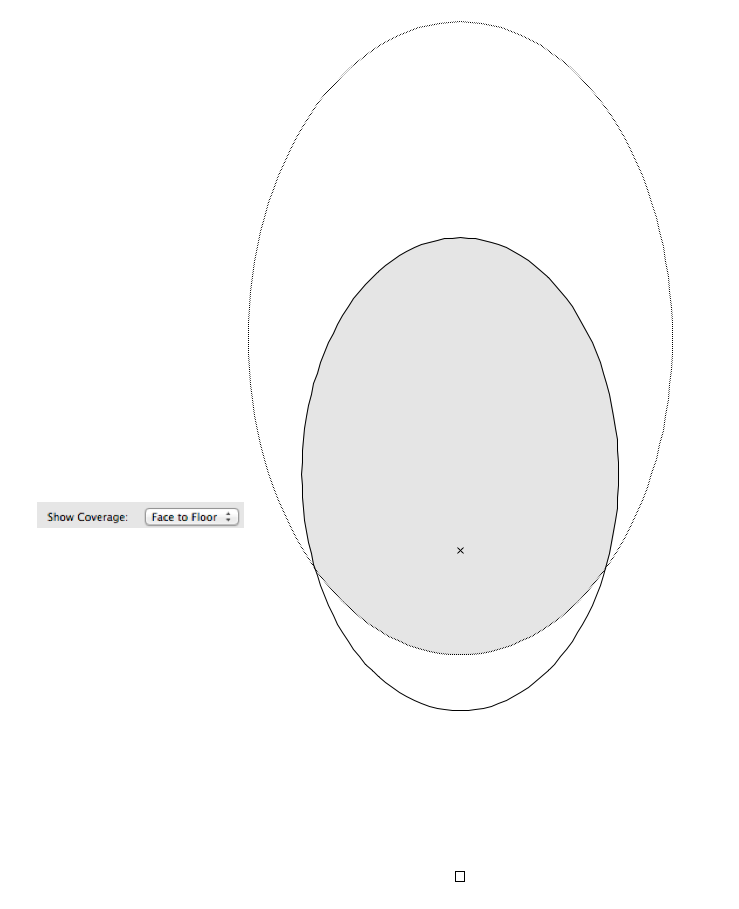
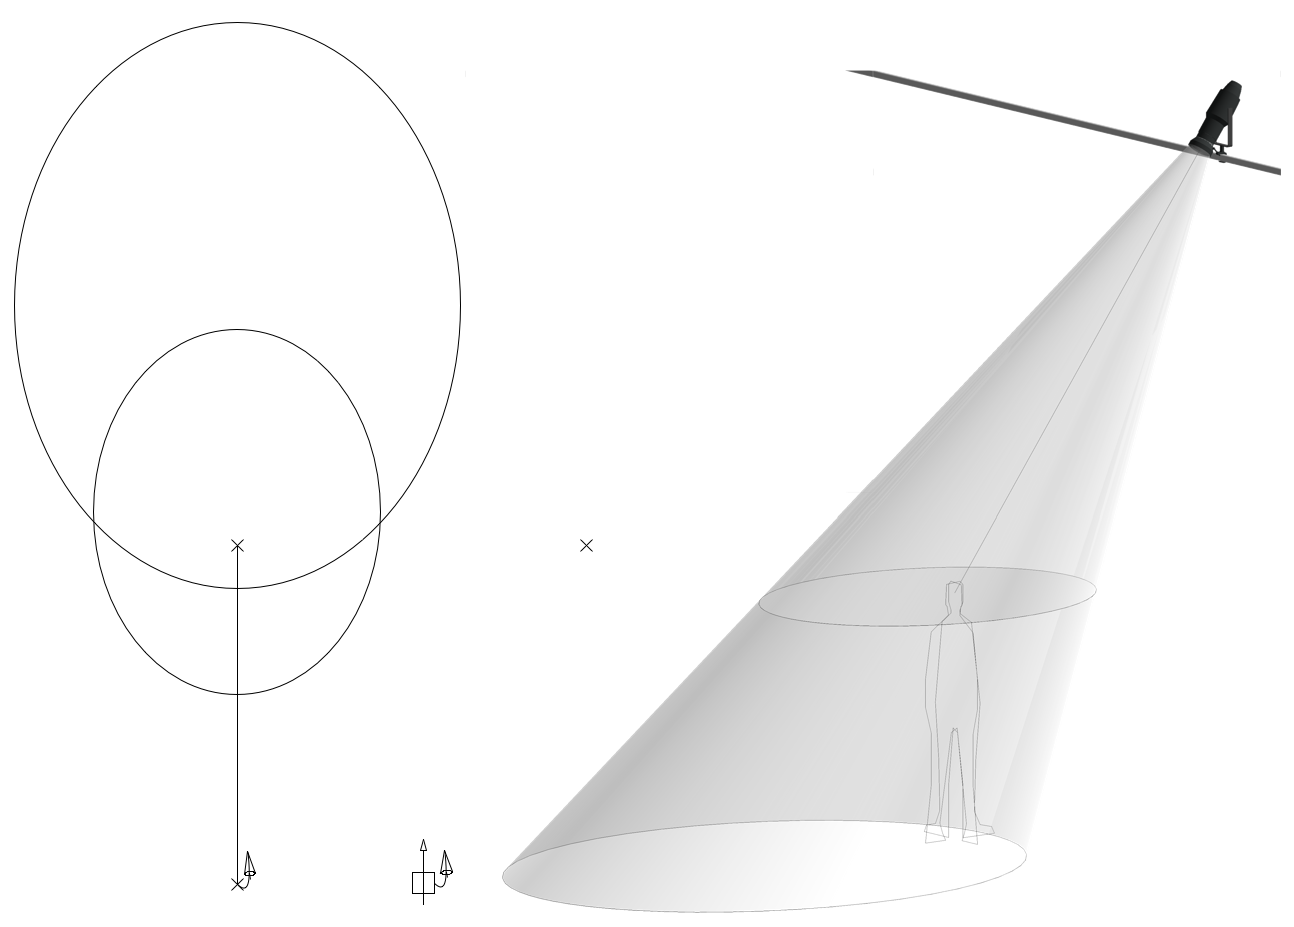
Coverage Map

Coverage Map feature shows full body or other user-specified coverage in plan view
Screen_Shot

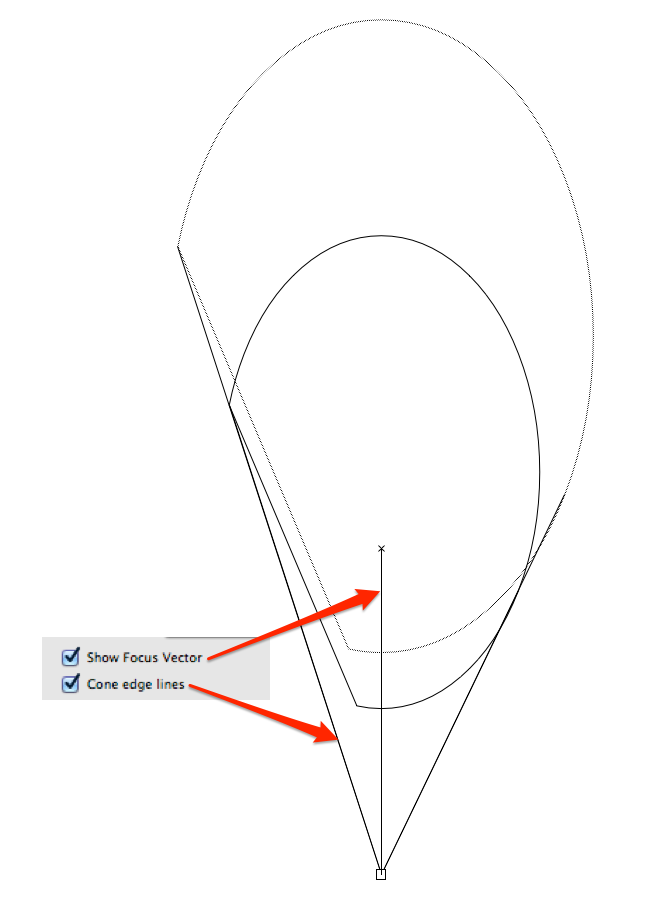
Cone Edges and Focus Vectors

Cone Edge Lines option to display lines defining the beam cone in plan view. The cone edge accurately adjusts to shutter cuts and bottle rotations

Show Focus Vector option to show a line representing the light’s focus

Spotlight Focus Point Integration

Parameter to focus a Beam to an existing Spotlight Focus Point
Screen_Shot

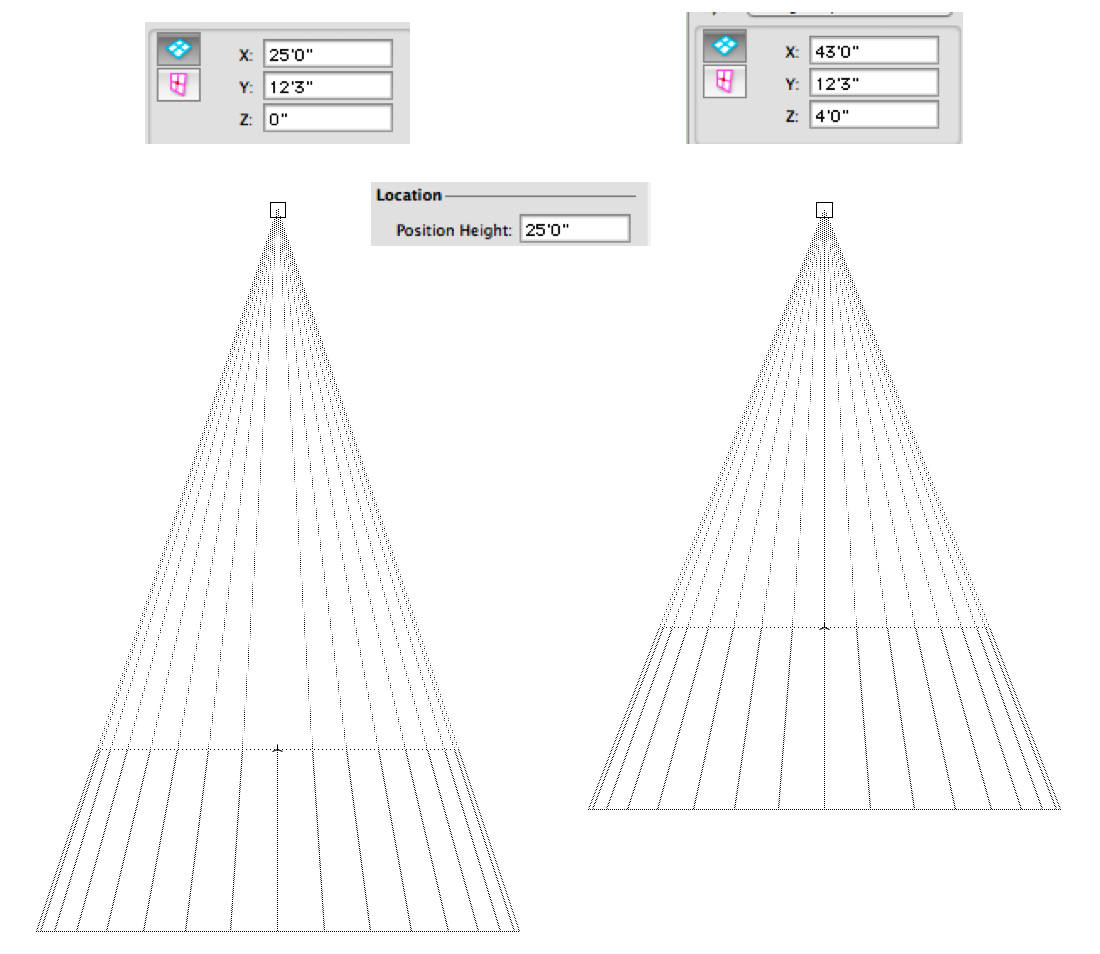
Z Height Used for the Ground Reference

Now use the z height to visualize beams above or below the ground plane without adjusting the beam’s position height
Screen_Shot

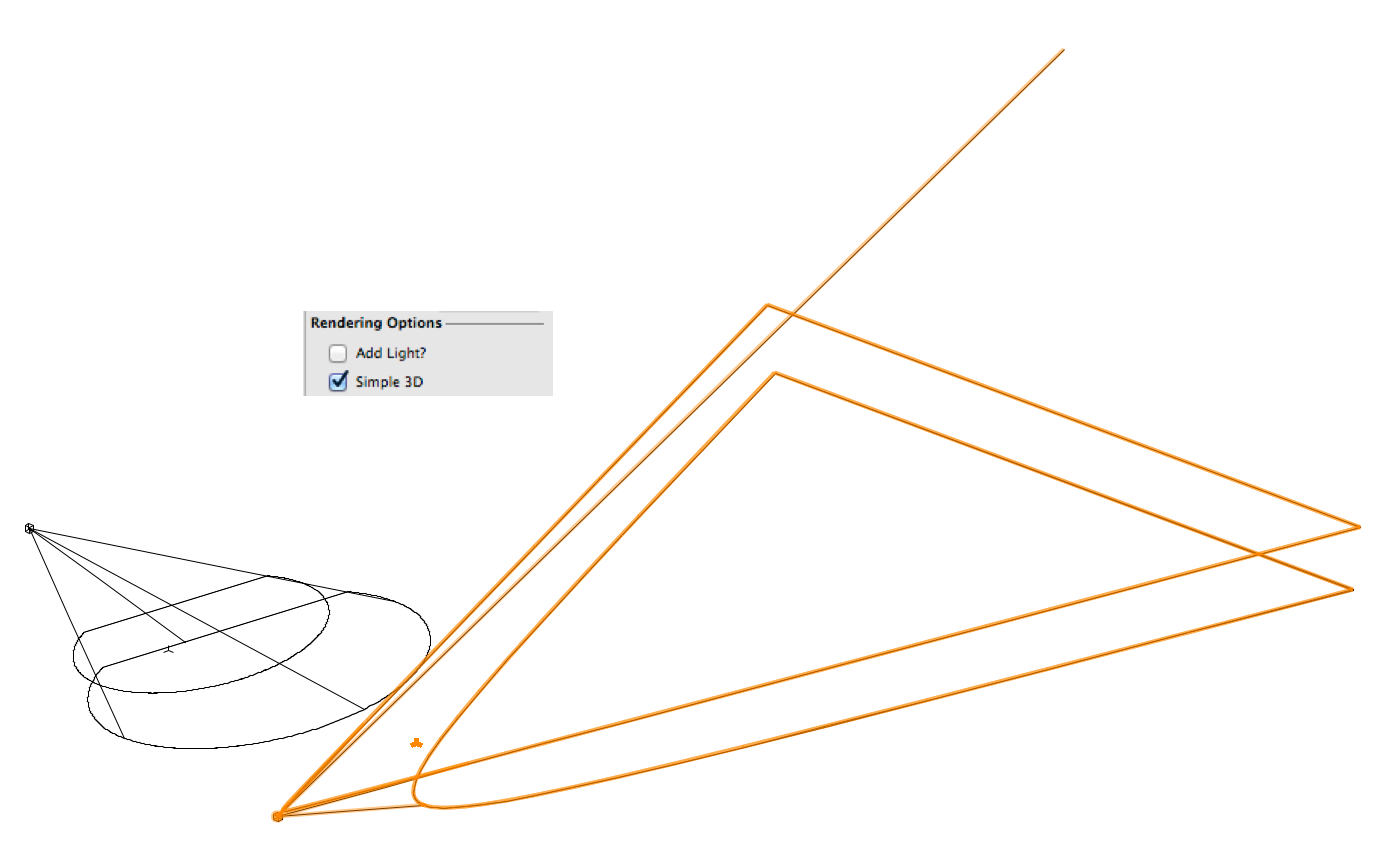
Simple 3D Mode

Simple 3D mode shows only cut planes and cone bounds
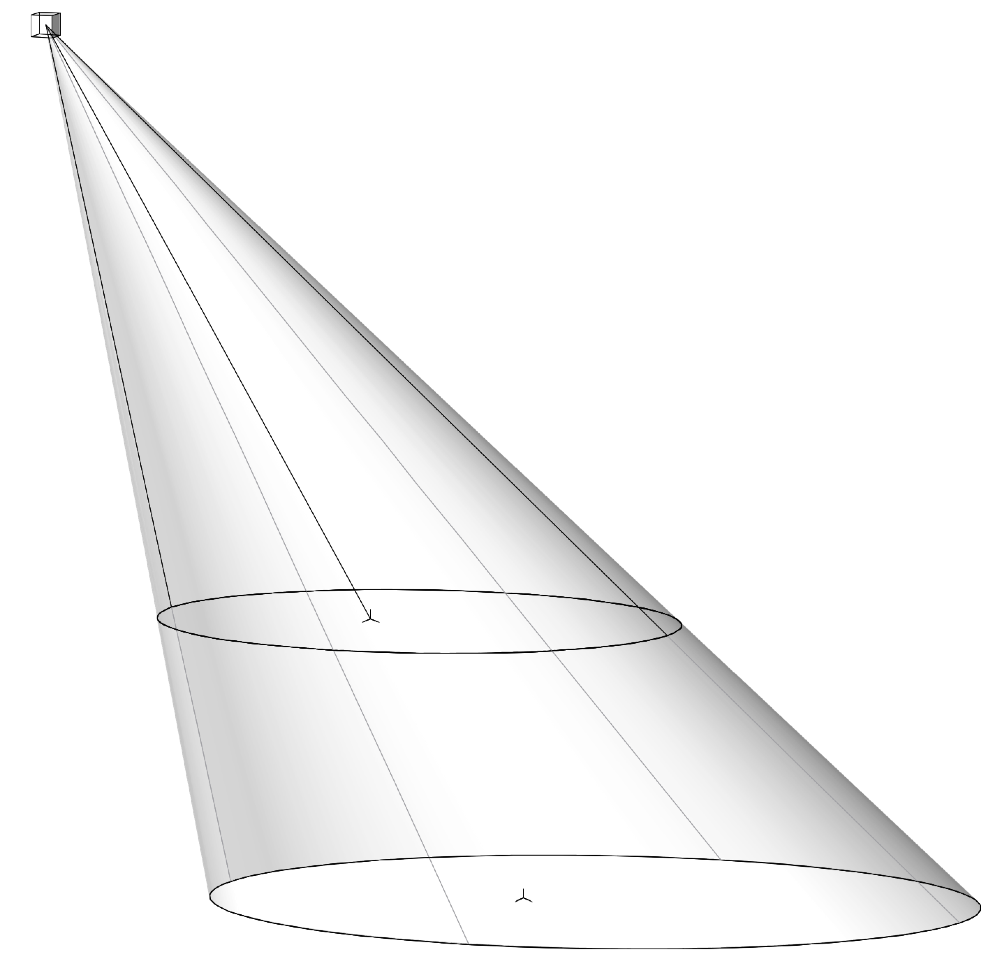
Screen_Shot

Smooth 3D Visualization

3D components drawn with NURBS, resulting in faster and more elegant rendering
Screen_Shot

Unparalleled Visualization of Low Angles

Accurate shutter cuts and bottle rotations for low angles that create parabolic coverage areas
Screen_Shot

Overhung Units

Indicator when a light is overhung (negative clamp distance)

When converted to Lighting Devices, overhung units now also affect the 3D component

Logical Rotation Behavior

Beams logically respond to rotate commands, depending on the mode:

  • Fixed: Rotates beam (PAR bottles)
  • Dynamic: Rotates the focus about the instrument
  • Fixed Focus: Rotates instrument about focus
Screen_Shot

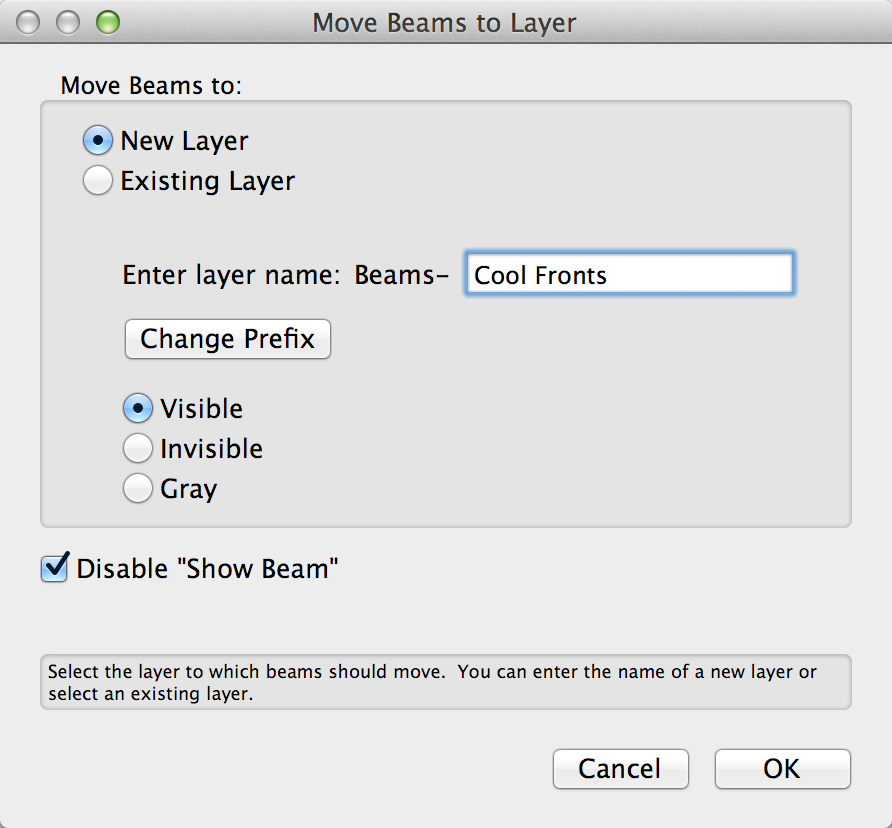
Move Beams to Layer

Quickly file away beams in a system to their own, hidden layer.

Includes options to select an existing layer, change the layer prefix, and set the visibility for new layers

Option to deselect the Show Beam parameter, converting objects to “rough plot” mode
Screen_Shot

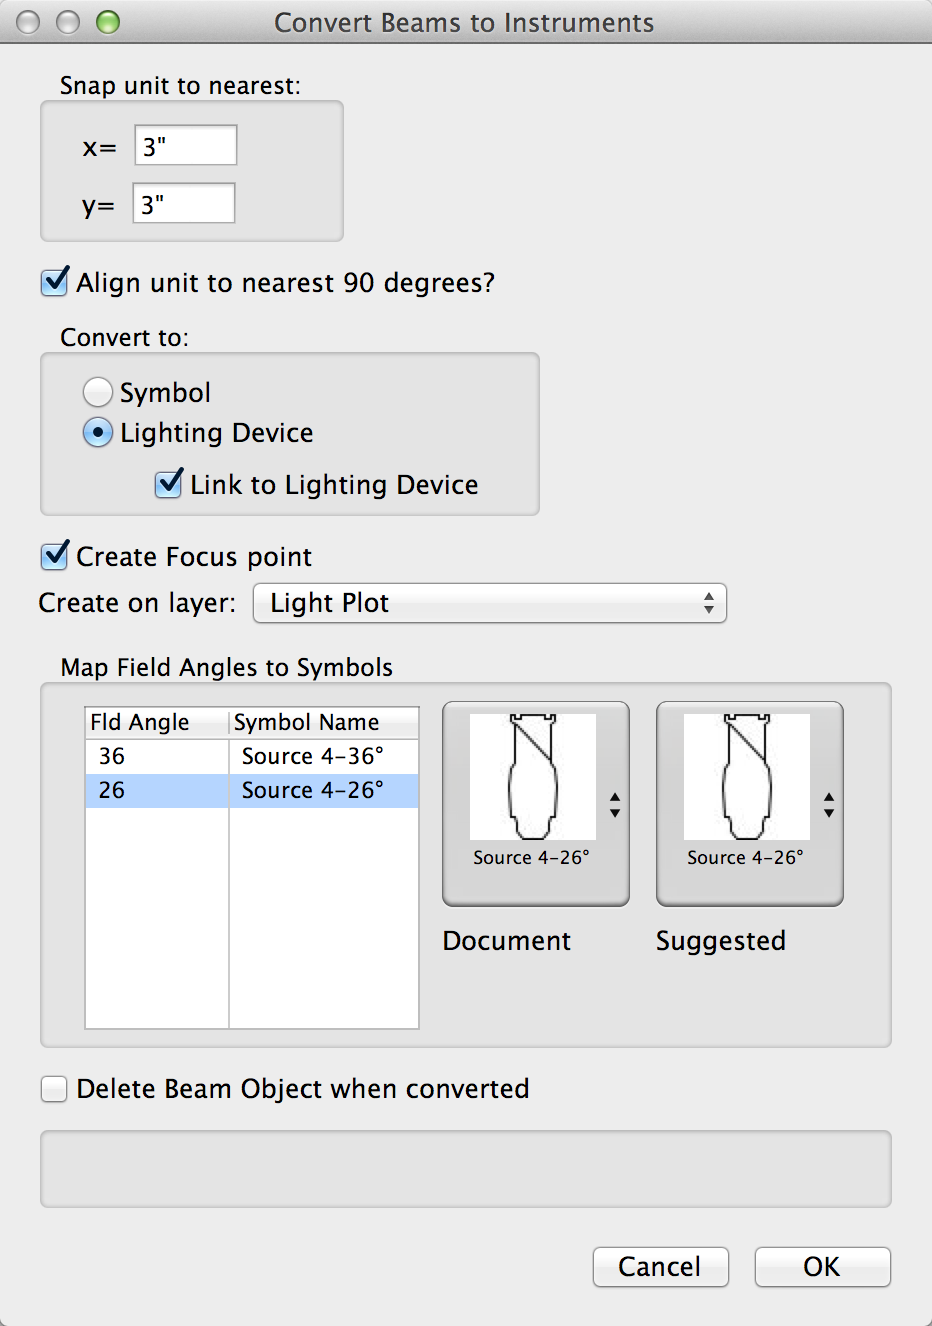
Convert Beam to Instrument

Easily convert beam objects into SpotLight lighting devices.

Added option to create focus point at the beam’s focus. If a focus point already exists at that location, both the Beam and the Lighting Device will be set to that focus point

Beam Object’s shutters, rotations, and focus points now transfer to Lighting Devices

Overhung lights (Negative clamp distance) translate to the 3D component of Lighting Device

New option to link beams to their corresponding lighting device, which will push beam angles, position height, instrument location, over / underhung status, shutter cuts, bottle rotation, focus point, channel, and purpose, and will pull instrument location, channel, and purpose

Linked beams include buttons to update the beam from the light and to unlink the beam from the light

Now works in 3D views
Screen_Shot

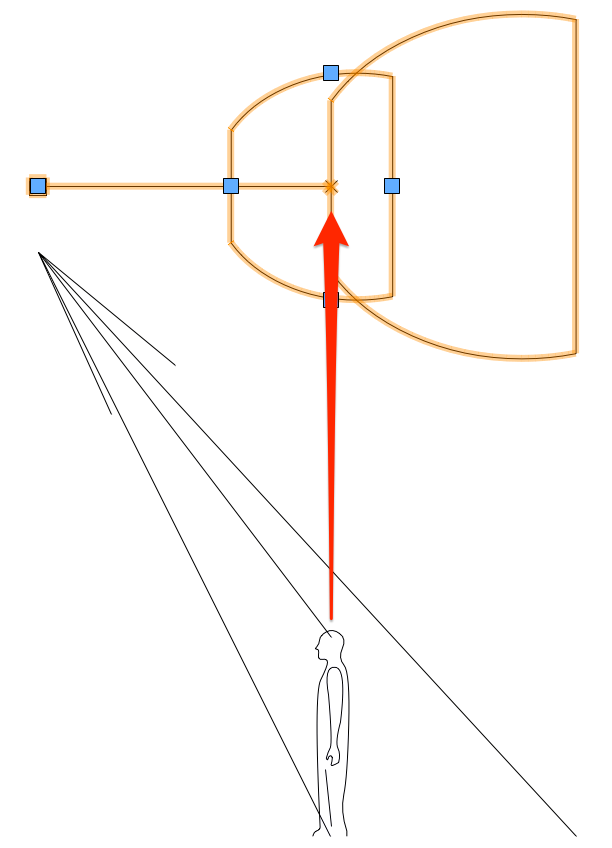
Section Beam to Plan

Converts the selected BD Section to a Beam Draw object

Reverse and Repeat

Command to reverse and repeat beams. It even will R&R shutter cuts and bottle rotations.

Channel Beams

If you are working with one system of beams at a time, you can easily channel them, and the data will be transferred when you convert the beams to Spotlight lighting devices.

BeamViz Magic

BeamViz Magic pulls position and channel data from your beams for use on a sheet layer magic sheet. You can even adjust your channel numbers to accommodate similarly focused or reverse-and-repeated systems.

Send to ETC Augment3D

  • Export BeamViz data to ETC Eos Augment3D via an OSC connection. You will find a new menu command: Export BeamViz to Augment3D, and a help guide in the resulting dialog. Data includes:
    • Position
    • Orientation (Pan and Tilt)
    • Field angle
    • Shutters
    • Gobo rotation
    • Gel color
    • Purpose
    • Focus
  • Option to send only selected beams
  • Option to ignore pan and tilt, perfect for sending the correct hanging point and fixture orientation for moving lights

Tighter Spotlight Integration

Pan and tilt synchronize to linked lighting devices.

  • This includes when using the new Spotlight focus commands and tools

New command to add BeamViz objects to existing lights

Peak Candela synchronizes to Lighting Devices and render lights

Usability Enhancements

Better user feedback inserting, reshaping, and moving beams

  • New insertion mode to draw from the focus point to hanging location
  • Consistent visual feedback shows the cone edge and beam cross section when inserting in two-point mode, dragging the focus or light control points, or dragging the beam in fixed height mode
  • Inserting in two point mode or dragging the focus or light location shows the throw distance and angle to face in the data bar

Simplified and enhanced interaction locks

  • An improved interface in Object Info affects behavior for drags, pans, tilts, rotations, and changing the throw
    • One option for locking the location of the Light or Focus point
    • Another for locking the length of focus and hanging heights, the throw, or the plan distance
    • The new option for locking plan distance is useful for working with booms or tail downs. Input a face angle, and BeamViz will calculate the correct hanging height of the light without changing the plan location.

Support for any yoke angle

  • Easier to visualize overhung units
  • Correctly calculates angle and throw in both 2D and 3D
  • Synchronizes to Lighting Devices
  • Unlike a Lighting Device, maintains focus even without Focus Points

Visual indicator for beams linked to lighting devices

Enhanced detection of focus points

  • Dragging the focus control point now detects focus points
  • Dragging the insertion point of the beam on to a focus point will detect it
  • Copying a beam or moving with throw or plan distance locked will now detect any visible focus points and set the beam to that focus.

New parameter to show/hide beam angle

Convert to Lighting Devices now remembers how angles map to lighting instrument types

Rotation improvements

  • Several changes to clarify the light rotation versus pan. The BeamViz object orientation corresponds to the hanging orientation of the light.
  • 2D views show an indicator of fixture orientation
  • The rotation parameter now appears in the Location section of Object Info
  • The light’s rotation only changes:
    • When inserting the BeamViz object
    • Changing the rotation parameter in Object Info
    • Using the rotation tool with any point other than the focus as the center of rotation
  • Using any of the rotate menu commands will rotate the beam around the anchor point specified in Object Info. Using the rotate tool will rotate the object as indicated by the tool preview.

Shutter cut improvements

  • Selectable shutter cut plane
  • Color coded control points make identifying cuts easier
  • Adjust shutter angles via control points

3D Visualization enhancements

Lighting symbols follow focus

When using a Spotlight-ready symbol for the light indicator, the 3D component will adjust pan, tilt, and yoke angle to the focus, allowing complete visualization without Lighting Devices

Turn render lights on and off via Object Info

Reviews

There are no reviews yet.

Only logged in customers who have purchased this product may leave a review.

QWho is eligible to use a student license?  
A

In order to use the plug-in at the student rate, you must use the free, watermarked, educational Vectorworks license. 

Educators with a standard Vectorworks license must purchase a standard license as well. Please contact us if you would like a time-sensitive demo code for demonstrating a plug-in to your class.

If you have a CAD lab of five or more seats, please contact us to see if you are eligible for a free license.

 
QWhat happens if I upgrade or switch platforms?  
A

All JBLD plug-ins are platform as well as version independent. You may use your license with any version of Vectorworks from the minimal supported version up.

They are, however, linked to a specific seat of Vectorworks, meaning you may use them with a specific Vectorworks serial number and its subsequent upgrades.

Savvy Series licenses are linked to a specific version of Vectorworks. For example, if you have the 2020 Savvy Subscription Series, it will work in perpetuity with Vectorworks 2020.

 
QWhen I enter my registration key, the OK button remains grayed out....
A

If you enter a registration code but the “OK” button remains grayed, please double check the following:

  1. Make sure you have installed the latest version of the plug-in.  You can download the current release any time from the Downloads page.
  2. Make sure you are matching the correct registration code to the correct product.
  3. If you purchased a student version (registration begins with “A”), it will only work with an E series, free educational license of VectorWorks.  You can purchase an upgrade to a full version of the plug-in.
  4. If copying and pasting in your registration code, make sure there are no spaces or carriage returns at the beginning or end of the field.  If you use the arrow key to move to the ends of the field, you may catch the extra characters.
  5. The code is case sensitive.
  6. All “0” are zeros. (Except for the Savvy Section product code, SO.)
  7. Make sure your Vectorworks seat registration is correct.  In your plug-in registration, nnnn-nnnn-XXXXXX-nnnn, XXXXXX should match the last six characters of your Vectorworks serial number.

If you have tried all these steps, and your registration code still produces an error, there will be a 5 digit code next to the registration field. Please follow this link and enter it into the troubleshooting formfollow this link and enter it into the troubleshooting form.

If you do not see the error code, make sure you have updated to the latest version, and have entered your user name.

If there is still no error code, you have entered a registration with too many or too few characters.

 
QWhere are the plug-ins and help installed?  
A
By default, the plug-ins, libraries, and workspaces all get installed in your Vectorworks user data folder.
 
On the Mac this is: ~/Library/Application Support/Vectorworks/{version number}
On Windows, this is: /users/{user_name}/Application Data/Nemetschek/Vectorworks/{version number}
 
You can confirm the location that Vectorworks looks for user data. Open Vectorworks preferences (Tools>Options>Vectorworks Preferences…). Switch to the User Folders tab. You will see the setting for your user data folder.
 
Note, if you are confirming installation via the Plug-in Manager, compiled plug-ins appear in the Built-in tab, not the Third-party tab
 
QHow do I control the intensity of projected light in ProjectionViz?
A

Projected images utilize Vectorworks’ render lights, which you can control via several methods.

Distance Falloff

In Rendering Options, ProjectionViz provides direct access to the light’s distance falloff settings, how much the intensity drops with distance. 

Smooth – linear falloff

Realistic – intensity diminishes with the distance squared, which models real-world behavior

None – no intensity degradation with distance For planning purposes, choosing None will improve brightness and flatness of the image.

Lumens

If you are rendering in Renderworks or Redshift, the light’s intensity will be set by the Lumens field in the Lens and image section of the ProjectionViz object. 

Note that rendering is not an accurate gauge of how bright the projection will appear on site. Renderworks, Redshift, and shaded render modes handle brightness values slightly differently, and the render will also depend on render and camera settings. Using the computed Luminance field is a better practice.

When controlled by lumens, brightness will also be affected by the Emitter Brightness setting in Lighting Options.

Using the Visualization Palette to affect intensity

The projected image’s light source will appear in the Visualization Palette. If the palette is not visible, select Window>Palettes>Visualization.

ProjectionViz objects will have their lights prefixed with “PV-.” You can further identify a light by entering a unique name for the projector in the at the bottom of Object Info.

The On setting synchronizes to the ProjectionViz object’s setting in Object Info. If you right-click or use the hamburger menu to select Edit…, you can further adjust the light’s brightness and color temperature.

Notice that setting the Dimmer/Brightness(%) value above 100% is possible. (Yes, you can take it up to 11).

If you have a Lumens value set in Object Info, Use Emitter and the Brightness Value will always be overwritten. In order to compensate for the round light source, you will notice the lumens value to be higher in the light’s properties.

You can use the Visualization Palette in Sheet Layer Viewports to control the projected image for only that viewport, overriding the design layer settings.

See: The Visualization Palette in Vectorworks help

See: Light source properties in Vectorworks help

Ambient light settings

You can increase the contrast of your projected image, change the ambient light brightness in Lighting Options. The ambient light setting effectively sets the black point for unlit surfaces.

Design layers’ Lighting Options are accessible through View>Set Lighting Options… In addition, viewports and Renderworks Styles can contain their own lighting options.

See: Setting lighting options in Vectorworks help

Purchase Viz Bundle

Product Quantity

ProjectionViz 1

ProjectionViz 2

BeamViz 6

1

Please enter the last six characters of your Vectorworks serial number